1) Use the right size book for the right size photos. Multiple 4×6 or 5×7 photos at full size do not usually fit inside an 8×8 book.
2) When using buttons, fit to appropriate size. Coat buttons are 1 inch across. Shirt buttons are a half inch and baby buttons are a quarter of an inch. Check element size in the LAYOUT tab and a ruler.
3) Turn rulers on to check alignment, equal size borders etc. Turn them off for an overall design feel.
4) Alphabets are easier to find if you place only one number, one lower case, one upper case in your MY FAVORITES folder.
5) We see the finished book in spreads. Go to the VIEW/PRINT PREVIEW. Faster easier, more reliable.
6) A well designed page should work upside down or sideways. Flip things, and change them up to make a spread.
7) Change the size of elements that drop on the page at equal size. In nature, little is identical in size or rotation.

Go to MyStoryBookLady.com and have fun in your Studio today! ~ Betty
Thursday, August 4, 2011
Studio Tips

Monday, May 9, 2011

Thursday, August 5, 2010
Tips For Creating Photo Jewelry Projects with Studio
Here are some helpful tips for getting the best results when designing jewelry using Studio at MyStoryBookLady.com. Be sure to order your necklace and bracelet credits before August 31st while they are on sale. My design services are FREE with your purchase if you choose not to design it yourself. Email me your order and your photos...I'm happy to help :) ~ Betty
Monday, August 2, 2010
10 Tips For Taking Baby Photos
Thanks to our friends from Kodak, check out these 10 tips for taking the perfect baby photo.
1. Get down on their level. Hold your camera at the baby’s eye level to capture the power of those magnetic gazes and mesmerizing smiles.
2. Use a plain background. An uncluttered background forces attention on your baby. Place your baby against a plain background or move yourself (and the camera) a few feet.
3. Capture feelings. A smirk, a frown, a wail - capture all the emotions, not just the pretty smiles. Babies are uninhibited and uncensored, show it in your pictures.
4. Get close. Zoom in, filling the frame to emphasize what’s important, creating a more impactful photo. Capture the details, like blue eyes, a toothless smile, or tiny fingers.
5. Show scale. Take pictures of your baby with items that will show her relative size - a teddy bear or Daddy’s hands. Take a series of pictures with the same object as your baby grows.
6. Try different angles. Get down on their level, shoot from high above, shoot some sideways, some looking up at them.
7. Include other people. Capture others with the baby - Big Sister feeding the baby or Grandpa dancing with his little grandson. Make sure to include everyone who visits your baby.
8. Take some vertical pictures. Many subjects look better in a vertical picture - from the Eiffel Tower to portraits of your friends. Make a conscious effort to take some vertical pictures.
9. Use natural light. Shoot photos next to windows or outdoors, taking advantage of natural light. Cloudy, overcast days provide the best lighting for pictures of people.
10. Take lots of photos. Always keep your camera handy! Babies change so fast, capture every moment right from birth, including all firsts. Document a day in the life of your baby.
For more tips, tricks, projects and ideas on photographing babies, visit Kodak.
from blog.heritagemakers.com
Tuesday, March 9, 2010
Tips For Managing Your Photos
By Bryndi Cloward,
Because of the digital age and because camera memory is not an issue, we can take 100 pictures of some small-hour events. Many times we will take the same shot five to seven times just to make sure we get a good shot. But for a book, we don’t need all seven shots of Billy Joe eating his corn on the cob.
By Debbi Heaps, HR/Exec. Admin
Take the time to manage your photos before you take them off your camera. Doing so will help eliminate some of the overwhelming frustration of having to search through all your photos later. It’s that ole “take time to sharpen the saw” wisdom.
By
When uploading your photos, if you get a 2038 error, or only a couple of images load while others don’t or get stuck loading, go to the original file on your computer and open it using an image view program. Resave the image as a JPG and re-upload the image to Heritage Makers.
By
Before you upload photos to Heritage Makers, rotate images so they are set at the right angle. You can rotate inside Studio (not within your photos folder); however, when you submit a project as a template with photos that have been rotated inside Studio, new photos—if in the correct rotation before—will no longer be rotated correctly. Making sure your photos are rotated correctly before hand will help your design and other designs flow mush easier.
By
With a Basic account, you have limited photo storage space (1 GB), compared to the unlimited space Premier members have. To help save space, only upload the photos you know you are going to use in the project.
Tuesday, January 12, 2010
Basic Tips for All Projects
Heritage Makers is one of OPRAH'S ALL-TIME Favorite Things!
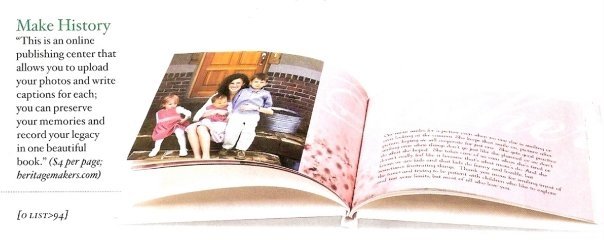
O Magazine, Dec 2008, page 94
Heritage Makers is one of OPRAH'S ALL-TIME Favorite Things!

Here's the full spread...
Heritage Makers is one of OPRAH'S ALL-TIME Favorite Things!

It's an honor to be listed on the same page as her favorite books...


 Posts
Posts